
Salem-Inspired Spooky Tablescape
- Sep 27, 2021
- 4 min read

Every fall, I daydream of visiting Salem, Massachusetts. With its haunting history and one-of-a-kind characters roaming the streets (hey, Laurie Cabot!), Salem is a trip for the bucket list. For this DIY Halloween decor, we're channeling Salem (think: cobbled streets and crumbling tombstones) to create a bewitching tablescape.
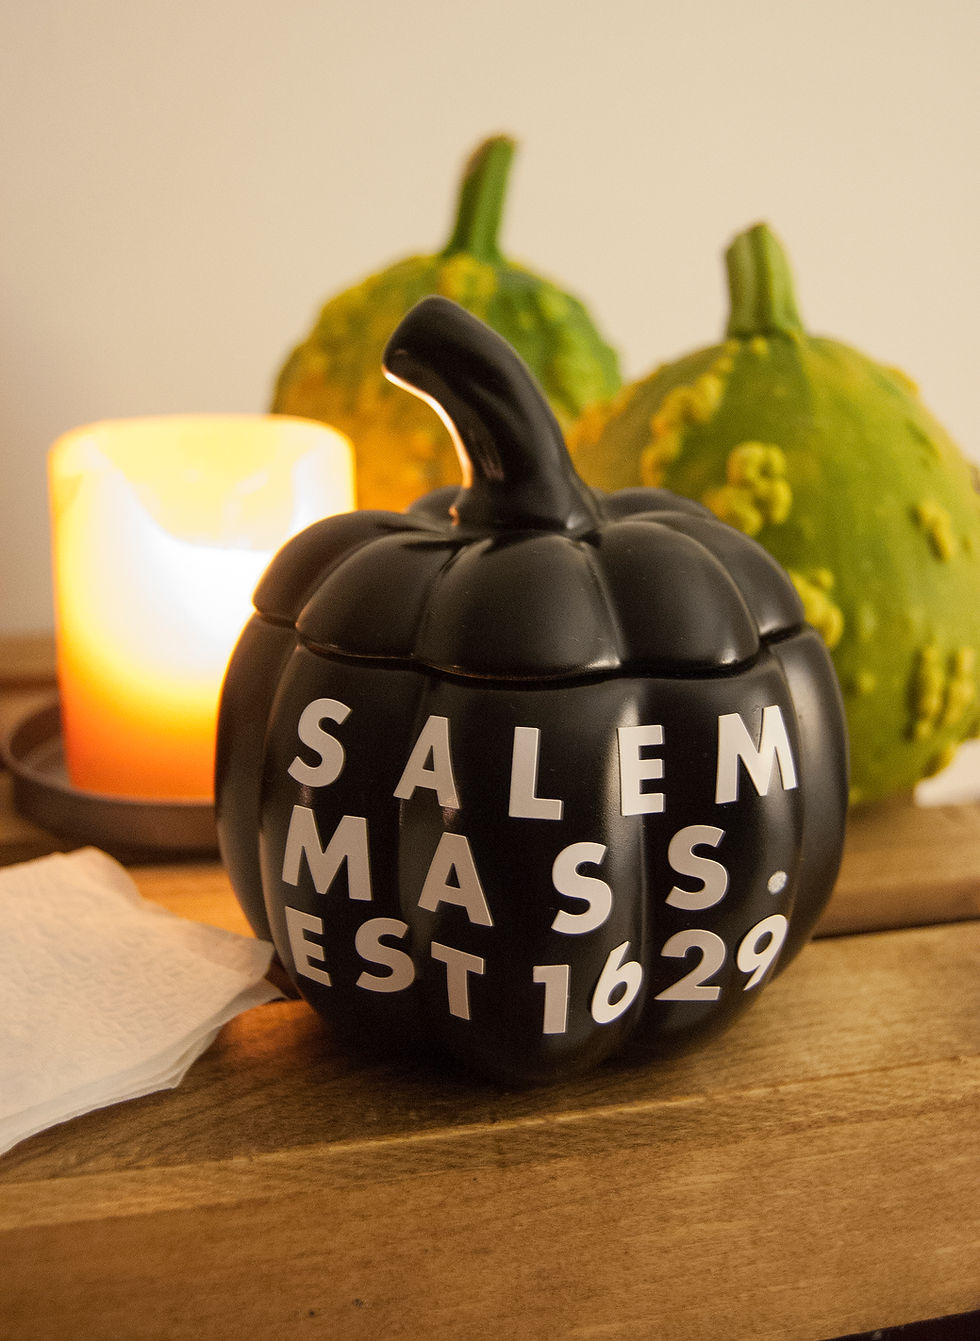
- TO MAKE THE PUMPKIN -
Materials:
- Thrifted faux pumpkin
- Spray paint in your color of choice
- Adhesive letters
- Washi tape
- Drop cloth or similar
- Soft tape measure (used for sewing)
- Paint pen (optional)
Step 1: Clean. Paint won’t stick well to a dirty surface, so wash your pumpkin with the correct method for the material it is made of. Mine was marked “dishwasher safe” on the bottom so I got to take the easy way out. For plastic pumpkins or something more delicate, you may need to wash it by hand or even just wipe it clean with alcohol wipes.

Step 2: Paint! Take your pumpkin outside or to a well-ventilated area. With a drop cloth or newspaper beneath it to protect the surrounding space, paint the pumpkin according to the instructions on your paint. Lids can be a little difficult since you’ll probably want to paint the bottom edge if it’s still be visible when the lid is on. I found that this trick with the empty water bottle (I cut off the top) worked really well. You could also paint the lid then flip it over and paint underneath. Just keep in mind that you don’t want to eat treats that have touched spray paint, so if you do paint any part of the inside you’ll probably want to use the jar only for wrapped candy.

Step 3: Add text. After the paint has fully dried, choose your phrase and find the right layout. Use washi tape and your soft tape measure to plan where each letter will go. I cut my washi tape to the width of the text lines so I could justify the lettering then, starting at the top, pressed it lightly onto the pumpkin in a straight line to make sure my words didn’t get stuck on unevenly. Once the first line of text was in place, I peeled up the tape and moved it down for the next line. Since there’s no punctuation in the sticker pack I got, I used a paint pen to add the period.

And that’s it for the pumpkin! Now, let’s figure out this table runner, shall we?
- TO MAKE THE RUNNER -
Materials
- Thrifted fabric
- Fabric paint
- Poster board, cardstock, or contact paper
- Yard stick or tape measure
- Marking tool
- Exacto knife
- Coarse paintbrush
- Scissors
- Painter’s tape (if using poster board or card stock)
- Something round to trace like a plate or lid
- Scrap cardboard

Step 1: Wash your fabric. If it’s safe for the dryer, you’ll want to do that first, too, to get any shrinking out of the way.

Step 2: Measure, mark, and cut the fabric. Lay it flat and choose the size and shape you want for your runner. Before you do this, decide whether you’d like to add any seam allowance. I left my edges raw because I wanted an aged and almost primitive look to my design. But, to make it last longer and look more crisp, you might choose to finish the edges.

Step 3: Cut the fabric. I cut out notches on each end of the runner just for fun. To do this, I measured up a few inches from the end and found the center of the runner at that point. I made a little mark then used my straight edge to draw a line connecting each corner to that center mark, thus creating a triangle. Snip away the triangle from there and you’re good!
Step 4: Finish the edges (optional). If you’re planning to sew your edges, now’s the time. You could also finish them with Fray Check if you want to prevent fraying and still skip the sewing.

Step 5: Create your stencils. If you’re using cardstock, plan for one moon on each page. If you’re using poster board or contact paper, you might want to create a little grid with evenly-spaced moons so you can move the phases around to play with the spacing between each once it’s laid out on the runner.
Step 6: Trace the full moon and two other phases onto the paper. The full moon is obviously just tracing once all the way around your circle. For the other two, trace most of the way around the moon then slide the plate/lid over slightly to one side and trace again on the same edge of the lid to connect the moon’s two points.
Step 7: Cut out the first three phases. With cardboard behind each phase, use the exacto knife to cut and extract the centers of each stencil.

Step 8: Flip the two crescent phases and trace them on paper to create the last two stencil pieces. Cut these out.

Step 9: Find the right placement of each phase on your runner and tape or pin them down. Place scrap cardboard behind each phase so the paint doesn’t bleed through to the work surface below.

Step 10: Paint each phase! Use your paintbrush to dab paint onto the runner within each phase’s stencil. Make sure you’re dabbing straight down not brushing the paint on so it doesn’t leak under the paper. After you’re done, carefully remove the stencils and wait the appropriate dry time before using.

Now your crafting is complete! If you shopped for Halloween supplies in our stores, then you have already joined Goodwill in giving back to your community. Of all the things on this table (besides the food, napkins, and paper plates), there are only three items on that aren’t thrifted. The silver serving tray was purchased during my most recent trip, specifically for this tablescape, alongside the fabric and pumpkin. The rest of the items have been collected in my visits over the last decade. That’s a whole lot of assistance I’ve contributed to my local community!

While you’re out thrifting don’t forget candles! I always grab candles when I see them at Goodwill. They’re smart to have on hand for power outages (We're lookin' at you, Winter Storm Uri), plus they make the spookiest lighting you can imagine for a Halloween party. Oh, and they’re lovely during the holiday season as well. Am I getting a little ahead of myself? Sorry! I can’t help it. After all, you know what comes after Halloween… Until then, happy crafting, my thrifty friends!

Comments